使用@PreAuthorize和@Secured的 Spring 方法安全性
Spring 框架使保护您的应用程序变得非常容易,您只需要正确地使用一些基本配置即可! 此安全性可以应用于 Web 应用程序中的多个级别。 Spring 对这些级别的基本支持:
- 网址级别的安全性
- 方法级别的安全性
- 实体或对象级别的安全性
在此 Spring Security 教程中,学习使用诸如@PreAuthorize和@Secured之类的注解来应用方法安全性。
启用@Secured和@PreAuthorize
方法级别安全性的核心是配置元素<global-method-security/>。 这需要在 spring 的配置文件中定义。 此元素用于在应用程序中启用基于注解的安全性(通过在元素上设置适当的属性)。 您只应声明一个<global-method-security/>元素。 例如
<global-method-security pre-post-annotations="enabled" />
以上配置将在代码中启用 @PreAuthorize 和 @PostAuthorize 注解。
//要么
上述配置的另一种变化是:
<global-method-security secured-annotations="enabled" />
这将在您的代码中启用 @Secured 注解。
这些注解采用一个字符串参数,该参数可以是role-name或表达式,并且取决于您对<http>元素的use-expression值的配置使用。
如果use-expression设置为 true,则应在注解内使用表达式,否则应直接使用角色名称。
如果您需要定义简单的规则,而不是根据用户的权限列表检查角色名称,则基于表达式的注解是一个不错的选择。 您可以在同一应用程序中启用一种以上类型的注解,但应避免在同一接口或类中混合使用多种注解类型,以免造成混淆。
测试安全性注解
为了在运行的应用程序中测试以上注解,我使用的是先前教程的代码库,该代码库与基于登录表单的安全性相关。
此应用程序已经过 URL 级别安全保护。 现在,我们还将添加对方法级别安全性的支持。
修改application-security.xml配置
为了启用对方法级别安全性的支持,我将使用<global-method-security>标记更新application-security.xml文件,如下所示:
application-security.xml
<?xml version="1.0" encoding="UTF-8"?>
<beans:beans xmlns="http://www.springframework.org/schema/security"
	xmlns:beans="http://www.springframework.org/schema/beans"
	xmlns:xsi="http://www.w3.org/2001/XMLSchema-instance"
	xsi:schemaLocation="http://www.springframework.org/schema/beans
	http://www.springframework.org/schema/beans/spring-beans-3.0.xsd
	http://www.springframework.org/schema/security
	http://www.springframework.org/schema/security/spring-security-3.0.3.xsd">

	<global-method-security pre-post-annotations="enabled" />

	<http auto-config="false"  use-expressions="true">
		<intercept-url pattern="/login" access="permitAll" />
		<intercept-url pattern="/logout" access="permitAll" />
		<intercept-url pattern="/accessdenied" access="permitAll" />
		<intercept-url pattern="/**" access="hasRole('ROLE_USER')" />
		<form-login login-page="/login" default-target-url="/list" authentication-failure-url="/accessdenied" />
		<logout logout-success-url="/logout" />
	</http>

	<authentication-manager alias="authenticationManager">
        <authentication-provider>
            <user-service>
                <user name="lokesh" password="password" authorities="ROLE_USER" />
                <user name="admin" password="password" authorities="ROLE_USER,ROLE_ADMIN" />
            </user-service>
        </authentication-provider>
    </authentication-manager>

    <beans:bean id="employeeDAO" class="com.howtodoinjava.dao.EmployeeDaoImpl" />
    <beans:bean id="employeeManager" class="com.howtodoinjava.service.EmployeeManagerImpl" />

</beans:beans>
其余所有代码与以前的教程相同。
注解方法以确保安全
在本教程中,我希望具有角色admin的用户只能将员工添加到员工集合。 像以前一样允许其他操作。 为此,我将在EmployeeDaoImpl.java中注解add方法,如下所示:
EmployeeDaoImpl.java
package com.howtodoinjava.dao;

import java.util.List;

import org.hibernate.SessionFactory;
import org.springframework.beans.factory.annotation.Autowired;
import org.springframework.security.access.prepost.PreAuthorize;
import org.springframework.stereotype.Repository;

import com.howtodoinjava.entity.EmployeeEntity;

@Repository
public class EmployeeDaoImpl implements EmployeeDAO  {

	@Autowired
    private SessionFactory sessionFactory;

	@PreAuthorize("hasRole('ROLE_ADMIN')")
	@Override
	public void addEmployee(EmployeeEntity employee) {
		//System.out.println(((User)SecurityContextHolder.getContext().getAuthentication().getPrincipal()).getAuthorities());
		this.sessionFactory.getCurrentSession().save(employee);
	}

	@SuppressWarnings("unchecked")
	@Override
	public List<EmployeeEntity> getAllEmployees() {
		return this.sessionFactory.getCurrentSession().createQuery("from Employee").list();
	}

	@Override
	public void deleteEmployee(Integer employeeId) {
		EmployeeEntity employee = (EmployeeEntity) sessionFactory.getCurrentSession().load(
				EmployeeEntity.class, employeeId);
        if (null != employee) {
        	this.sessionFactory.getCurrentSession().delete(employee);
        }
	}
}
@PreAuthorize注解将测试使用的登录帐户是否具有“ ROLE_ADMIN”授权。 如果用户没有此权限,将抛出拒绝访问的异常。
示例
我们的应用程序已配置完毕,可以部署了。 所以,让我们做吧!
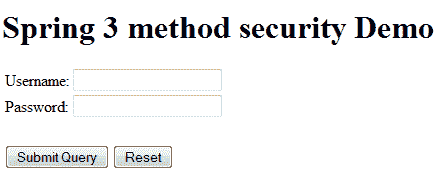
1)在浏览器窗口中点击网址“ http://localhost:8080/Spring3HibernateIntegration/login”
登录窗口
由于所有 URL 均受保护,因此将出现一个登录窗口。
2)使用用户名“ lokesh”和密码“ password”登录,然后尝试添加员工
拒绝访问消息
由于lokesh没有管理员权限,将引发拒绝访问的异常。
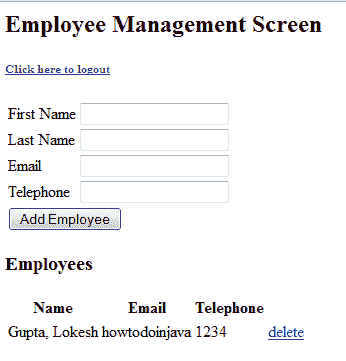
3)使用用户名“admin”和密码“password”登录,然后尝试添加员工
员工管理界面
管理员可以添加员工,因为已为其分配了“ROLE_ADMIN”。
如果您在运行该应用程序时遇到任何问题,请告诉我。
学习愉快!


