Spring 3 和 Hibernate 4 集成示例教程
原文: https://howtodoinjava.com/spring-orm/spring3-hibernate4-integration-example/
如果您浏览了我以前的文章,该文章也是同一主题,即 Spring 3 + Hibernate 集成 。 我在那篇文章中收到了很多评论和反馈,其中大部分是因为人们试图在现有项目中使用代码/依赖关系,或者他们没有使用 Maven 来构建项目。
在这两种情况下,正确识别和使用项目依赖项仍然是主要挑战。 因此,我决定写另一篇根本不使用 Maven 的文章。 如果确实如此,我已经在项目源代码本身中添加了所有必需的 jar 文件。
此外,我具有 Spring 的最新版本,即 3.0.5 至 3.2.5.RELEASE。
1. 开发环境
- Eclipse Juno RELEASE
- JDK 1.6
- Hibernate 4.0.1
- Spring 3.2.5.RELEASE
- MySQL 数据库
- Tomcat 7
对于那些直接来到本文的人,让我们逐步讲解 Spring Hibernate 集成示例。
2. 数据库架构
在开始采取行动之前,请确保您已经使用下表创建了数据库模式:
CREATE TABLE EMPLOYEE
(
	ID INT PRIMARY KEY AUTO_INCREMENT,
	FIRSTNAME VARCHAR(30),
	LASTNAME VARCHAR(30),
	TELEPHONE VARCHAR(15),
	EMAIL VARCHAR(30),
	CREATED TIMESTAMP DEFAULT NOW()
);
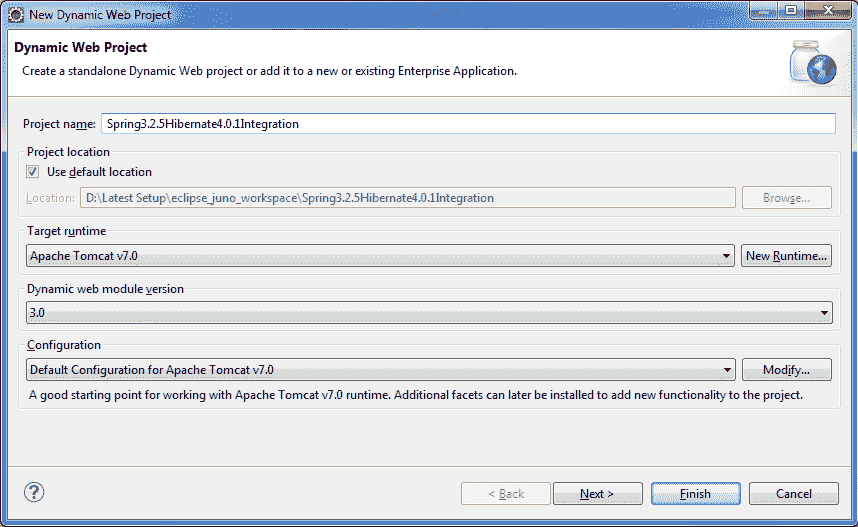
3. 创建 Maven Eclipse 动态 Web 项目
这不是困难的一步,而是重要的一步。 请确保您正在创建“Web 应用程序”而不是简单的“java 项目”。 我已经创建了名称为Spring3.2.5Hibernate4.0.1Integration的项目。
4. 创建配置
我不会在本节中强调更多,因为我没有使用上一篇文章中已经存在的新代码或函数集。 因此,请访问先前的示例 Hibernate+Spring 3 集成示例,以获取更多详细信息。
由于 Spring 版本的改进,我想在这里给出修改后的配置。
<?xml  version="1.0" encoding="UTF-8"?>
<beans xmlns="http://www.springframework.org/schema/beans"
    xmlns:xsi="http://www.w3.org/2001/XMLSchema-instance"
    xmlns:aop="http://www.springframework.org/schema/aop"
    xmlns:context="http://www.springframework.org/schema/context"
    xmlns:jee="http://www.springframework.org/schema/jee"
    xmlns:lang="http://www.springframework.org/schema/lang"
    xmlns:p="http://www.springframework.org/schema/p"
    xmlns:tx="http://www.springframework.org/schema/tx"
    xmlns:util="http://www.springframework.org/schema/util"
    xsi:schemaLocation="http://www.springframework.org/schema/beans http://www.springframework.org/schema/beans/spring-beans.xsd
        http://www.springframework.org/schema/aop http://www.springframework.org/schema/aop/spring-aop.xsd
        http://www.springframework.org/schema/context http://www.springframework.org/schema/context/spring-context.xsd
        http://www.springframework.org/schema/jee http://www.springframework.org/schema/jee/spring-jee.xsd
        http://www.springframework.org/schema/lang http://www.springframework.org/schema/lang/spring-lang.xsd
        http://www.springframework.org/schema/tx http://www.springframework.org/schema/tx/spring-tx.xsd
        http://www.springframework.org/schema/util http://www.springframework.org/schema/util/spring-util.xsd">

    <context:annotation-config />
    <context:component-scan base-package="com.howtodoinjava.controller" />

    <bean id="jspViewResolver"
        class="org.springframework.web.servlet.view.InternalResourceViewResolver">
        <property name="viewClass"
            value="org.springframework.web.servlet.view.JstlView" />
        <property name="prefix" value="/WEB-INF/view/" />
        <property name="suffix" value=".jsp" />
    </bean>

    <bean id="messageSource"
        class="org.springframework.context.support.ReloadableResourceBundleMessageSource">
        <property name="basename" value="classpath:messages" />
        <property name="defaultEncoding" value="UTF-8" />
    </bean>
    <bean id="propertyConfigurer"
        class="org.springframework.beans.factory.config.PropertyPlaceholderConfigurer"
        p:location="/WEB-INF/jdbc.properties" />

    <bean id="dataSource"
        class="org.apache.commons.dbcp.BasicDataSource" destroy-method="close"
        p:driverClassName="${jdbc.driverClassName}"
        p:url="${jdbc.databaseurl}" p:username="${jdbc.username}"
        p:password="${jdbc.password}" />

    <bean id="sessionFactory"
        class="org.springframework.orm.hibernate4.LocalSessionFactoryBean">
        <property name="dataSource" ref="dataSource" />
        <property name="configLocation">
            <value>classpath:hibernate.cfg.xml</value>
        </property>
        <property name="hibernateProperties">
            <props>
                <prop key="hibernate.dialect">${jdbc.dialect}</prop>
                <prop key="hibernate.show_sql">true</prop>
            </props>
        </property>
    </bean>

    <bean id="employeeDAO" class="com.howtodoinjava.dao.EmployeeDaoImpl"></bean>
    <bean id="employeeManager" class="com.howtodoinjava.service.EmployeeManagerImpl"></bean>

    <tx:annotation-driven transaction-manager="transactionManager"/>
    <bean id="transactionManager"
        class="org.springframework.orm.hibernate4.HibernateTransactionManager">
        <property name="sessionFactory" ref="sessionFactory" />
    </bean>

</beans>
5. 下载并复制lib文件夹中所需的 jar 文件
以前的帖子是关于 Maven 的,所以很多工作似乎都是多余的。 但是,对于使用 ANT 的用户,他们必须使用下载的 jar。 好吧,这一次,我已经为您完成了这项工作。 以下是此项目中使用的 jar 文件列表。
antlr-2.7.7.jar
aopalliance-1.0.jar
commons-collections-3.2.1.jar
commons-dbcp-1.4.jar
commons-lang-2.5.jar
commons-logging-1.1.1.jar
commons-pool-1.5.4.jar
dom4j-1.6.1.jar
hibernate-commons-annotations-3.2.0.Final.jar
hibernate-core-4.0.1.Final.jar
hibernate-jpa-2.1-api-1.0.0.Draft-16.jar
javassist-3.12.1.GA.jar
jboss-logging-3.1.1.GA.jar
jstl-1.2.jar
jta-1.1.jar
junit-4.11.jar
mysql-connector-java-5.1.9.jar
slf4j-api-1.6.1.jar
spring-aop-3.2.5.RELEASE.jar
spring-beans-3.2.5.RELEASE.jar
spring-context-3.2.5.RELEASE.jar
spring-context-support-3.2.5.RELEASE.jar
spring-core-3.2.5.RELEASE.jar
spring-expression-3.2.5.RELEASE.jar
spring-jdbc-3.2.5.RELEASE.jar
spring-orm-3.2.5.RELEASE.jar
spring-tx-3.2.5.RELEASE.jar
spring-web-3.2.5.RELEASE.jar
spring-webmvc-3.2.5.RELEASE.jar
standard-1.1.2.jar
将上述所有 jar 文件复制到lib文件夹中。
完成此步骤后,您的项目应如下所示:
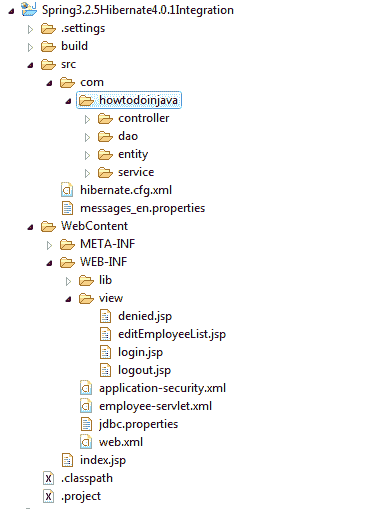
spring 3 项目层次结构
6. Spring Hibernate 集成示例演示
结果将类似于以前的帖子。 为了提醒您,屏幕将如下所示:
URL:http://localhost:8080/Spring3.2.5Hibernate4.0.1Integration/
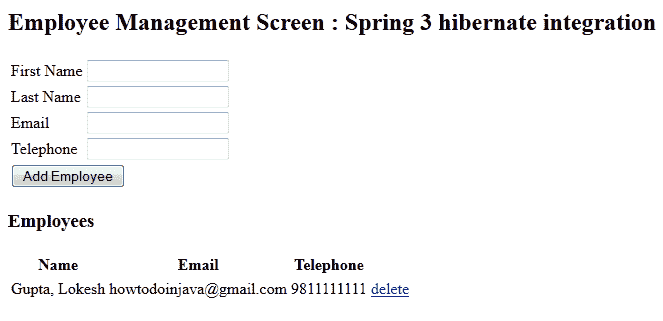
spring 3 + hibernate 集成示例
学习愉快!